Wednesday, May 29, 2013

Another Victorian-esque Drive


Similar approach to the last one: Start with a small block of wood (this a little section of 1" x 2" lumber), hollowed out with drill and tiny router bits. There's an additional hole in the top, drilled with a half-inch drill bit. The whole thing got stained and coated with shellac.

The half-inch hole got filled with a large-sized clothing grommet lined with a little square of brass cloth. The leather upholstery on the sides is cut from a disused glove and nailed/superglued in place. The gear is from a bag of old watch parts, while the corner piece and the "crank" are fashioned from scrapbooking and cheap jewelry pieces from the craft store, superglued in place.

After the drive was epoxied in place, I traced around the end of another USB plug on a scrap of wood veneer (collections of assorted samples are available cheaply on-line from veneer suppliers). Cutting the outline with an Xacto knife, I had a bit of veneer with a hole that fit snugly around the plug. Putting that on the end of the drive, I then traced around the end of the casing, removed it, and cut around the outline so it matched the dimensions of the casing as well. I found that sticking a bit of masking tape on the back while I was cutting greatly reduced splitting. Then I put it back on, glued it, and finished it with matching stain.

The nice bit about this one is that the amber LED attached to the drive, visible through the grommet, is designed to slowly fade in and out while the drive is plugged in. It gives a nice warm light reminiscent of a tube radio, which the finished casing vaguely resembles.

Saturday, May 18, 2013

Brass and wood thumb drive

So I made a decorative thing out of an old thumb drive. This is the less interesting side.


The electronics, such as they are, are cannibalized from an old thumb drive. They're cheap, and the case can be pried off easily with a screwdriver or cracked with pliers, leaving you with a circuit board attached to the USB plug itself. The whole thing's about the size of a stick of gum.

The heart of the case is a section of 3/4" wooden dowel. Most of the work on it was done with a Dremel drill press and a bunch of different bits. To make space for the drive, I drilled a bunch of holes in the end, more or less outlining a rectangular hole. A lot of material was removed by that alone, but I enlarged the hole with the aid of some router blades and a few others. By the end, it was nearly just a thin wooden shell.

The bands around ends are from a short section of copper pipe, removed with a pipe cutter (maybe $8 at your hardware store). Since they almost-but-not-quite fit over the ends of the dowel, I used a sanding/grinding bit around the ends of the dowel, shaving down the diameter just a bit, until the copper rings fit. The dowel was prepared for the other metal fittings by a lot of drilling, from tiny, tiny bits in the drill press for the parallel wires to a 3/16" bit (attached to a full-sized drill) for the top "window."

Once all the holes were drilled, the dowel got a coat of dark stain and then one of polyurethane to seal it. The various bits (decorative square brads and long bronze-ish pins from the craft store, a small grommet from the fabric store, and the aforementioned copper rings) were put in place and secured with garden-variety cyanoacrylate. The only unusual bit is that the grommet "porthole" has a layer of woven brass "fabric" behind it. I cut a tiny square, a bit larger than the diameter of the grommet itself, snipped off the corners to make sure they wouldn't project as much, and pushed the grommet through the hole in the dowel, wrapping the fabric over the end and helping wedge it in place.

The bullet end is made from a plastic gear (ordered in a large, cheap bag years ago) painted copper and secured by nailing a decorative tack from the hardware store into the end.


And when the drive is in use, you can see a bright red light through the porthole.

Friday, April 13, 2012

Ogre Mk. V

One of the niftier features of the designer's edition of Steve Jackson's classic wargame Ogre is the 3d Ogre designs, constructed from punch-out chipboard shapes.


As one of the stretch goals of the Ogre Kickstarter, reached absurdly quickly, they provided blank Ogre templates you can print out, decorate, and build yourself. But I thought "If I want a really big Ogre, I can do better than that..."

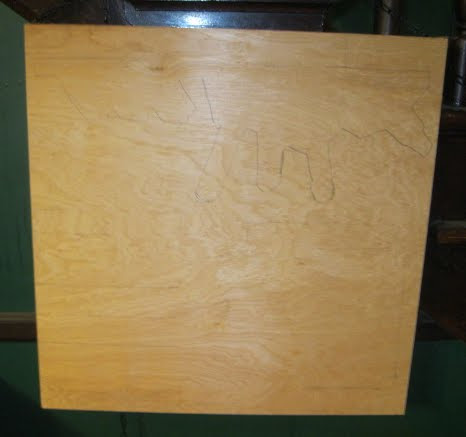
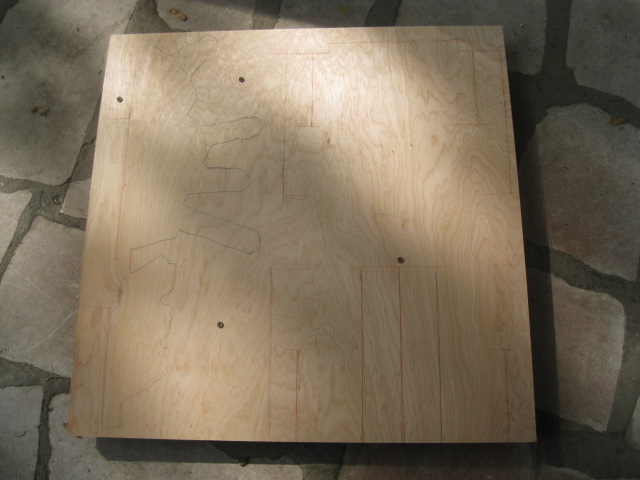
I started out with more 2' x 2' sheets of the quarter-inch birch plywood I used for the Batcave fan, a pencil, and a small art projector. Not cheap, but vital for this sort of thing. From a distance of about five feet, it magnified the largest piece of the Ogre to about two feet wide. Tracing the lines wasn't easy, given the slightly wobbly board I was working on and my utter lack of ability to draw a straight line.


Indeed, I went back over the forms with a straight edge and a red pencil.


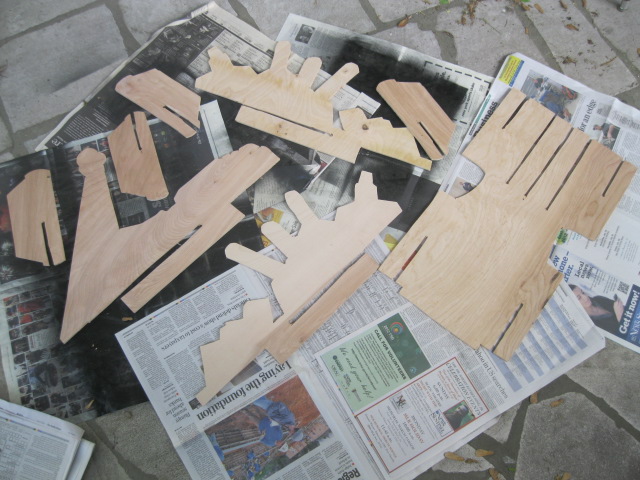
After clamping and screwing a few sheets of plywood together (so I'd have multiple sets of Ogre parts to experiment with), it became a simple matter of sawing things out. The only tricky bit was chopping out quarter-inch channels to fit the pieces together, which would be a lot easier if I had a router table.


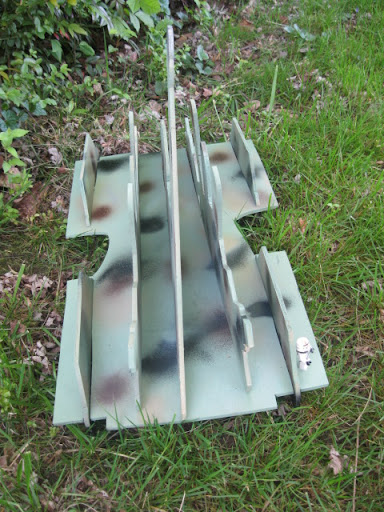
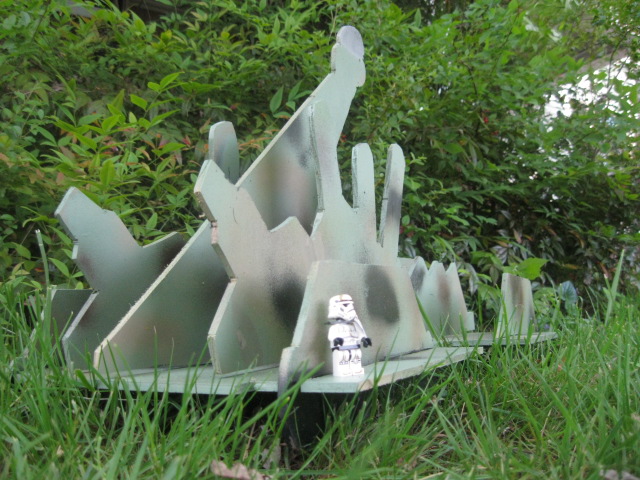
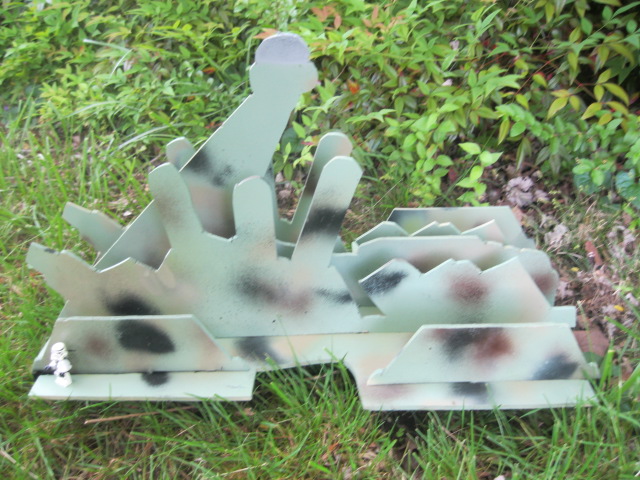
And after that, it was an even simpler matter of painting (light green base, spritzes of other colors to give the impression of camouflage) and then assembly. The finished Ogre is about two feet long and...well I haven't measured it, actually, but probably something over a foot from treads to the top of the conning tower. That's a Lego stormtrooper for scale.


Sunday, March 25, 2012

Fan

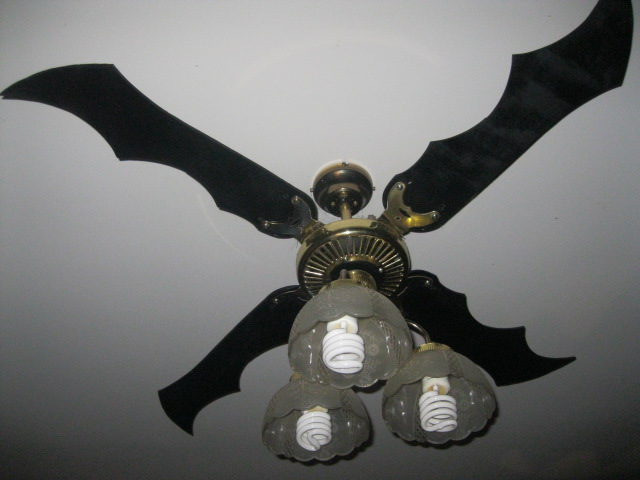
Alex has a ceiling fan. It's a typical ceiling fan, which is fine, but not very Batcave-like. So we decided to replace the blades with something a little more bat-themed, like what this guy made.

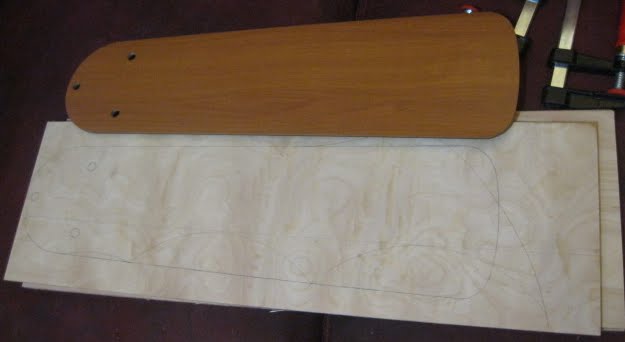
I got the recommended quarter-inch birch plywood and cut it into strips, then traced a fan blade onto one of them to get a general shape and size. The various curves defining the not-conventional-fan-blade bits of the fan blade were traced out using a dinner plate.


Once I had the basic design down, I stacked up the birch plywood strips, clamped them together, and started cutting with the remarkably versatile jig saw. I had to move the clamps around a few times to get access to all the places I needed to cut while keeping the stack together. After that, I drilled the screw holes, and painted.

The toughest part of this was installation. Because of the ten-foot ceilings, I was on top of a ladder trying to avoid rattling glassy fixtures to get the dusty old blades off and the new blades on. But it's worth it.

Sunday, February 26, 2012

Clock

We wanted Alex to have a clock with hands that fit the theme of the room, but we couldn't find anything that quite worked for us, so we decided to build our own. The clock mechanism proper is an inexpensive battery-powered job from the craft store, but we had to make the face.

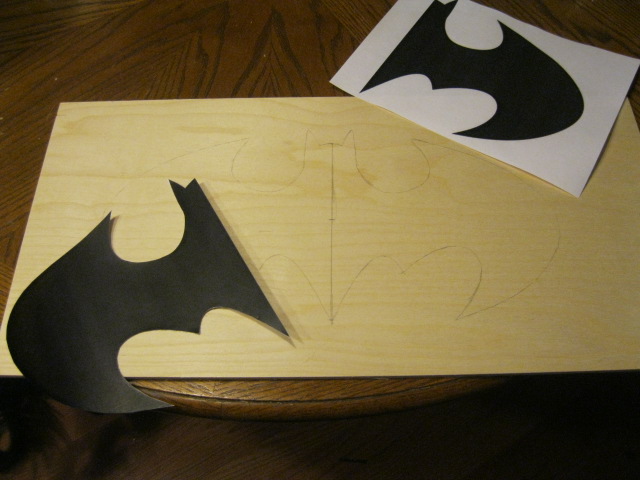
I started by enlarging a Bat symbol and printing it out (splitting it over two sheets of paper to get it to the size I wanted). Cut out, and trace onto a thin piece of wood:


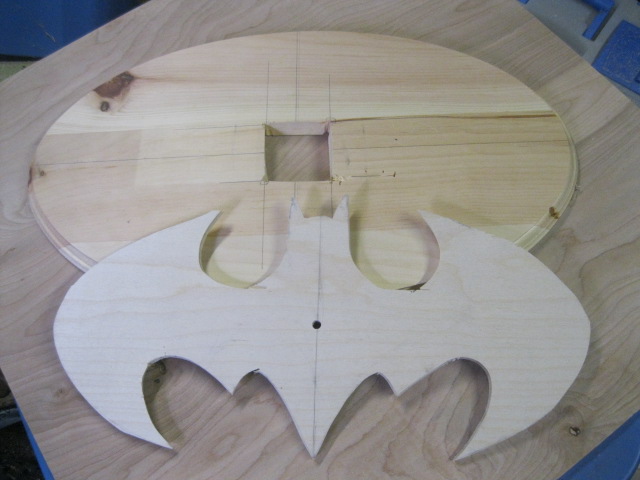
The jig saw did a surprisingly good job of cutting out the bat shape. I thought I'd have to rough it out with the jig saw and then finish by hand with a coping saw, but the power tool was able to do it all to my satisfaction. I put a hole in the middle for the center of the clock. Then I got a big oval wooden piece from the craft store, found the center, traced the clock body around it, drilled holes in the corner, and used the saw to chop out a space the clock could fit through.


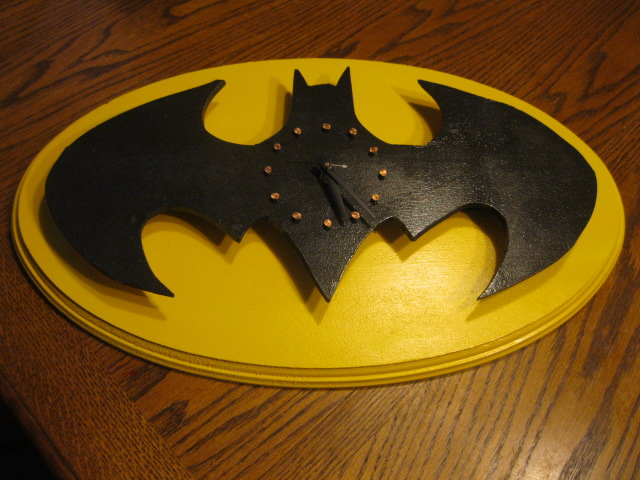
Using a protractor, I marked spots at 30 degree intervals at a set distance around the center of the clock and drilled small holes for later reference. The oval got a coat of yellow paint and the bat shape got black. Added copper nails in the little drilled holes, installed the clock behind the bat piece, then attached that to the oval. The battery can be removed through the hole cut in the center of the oval. This is the finished clock:


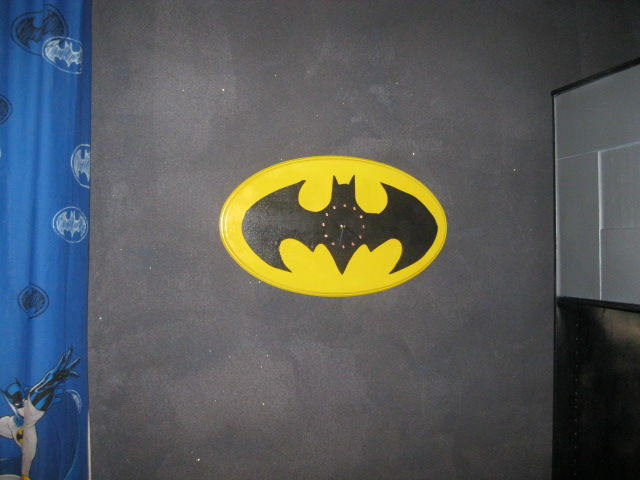
And here it is on the wall:

Friday, February 10, 2012

Computer

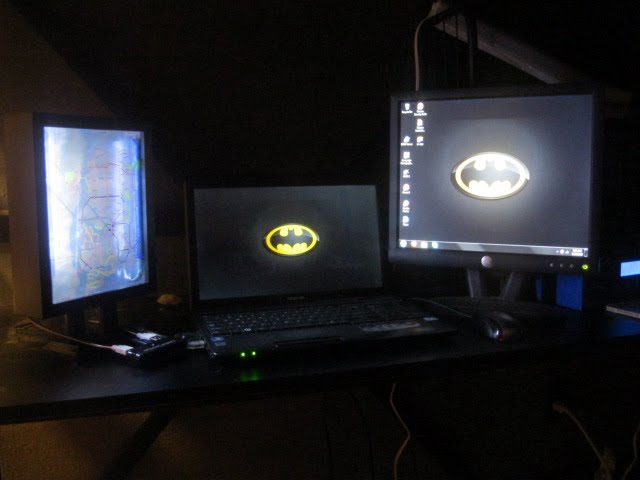
One of the features of Alex's new bed is that it has a desk underneath, giving him a nice place to do homework and put his computer. The image I've always had of the Batcomputer has involved a big, wrap-around screen:


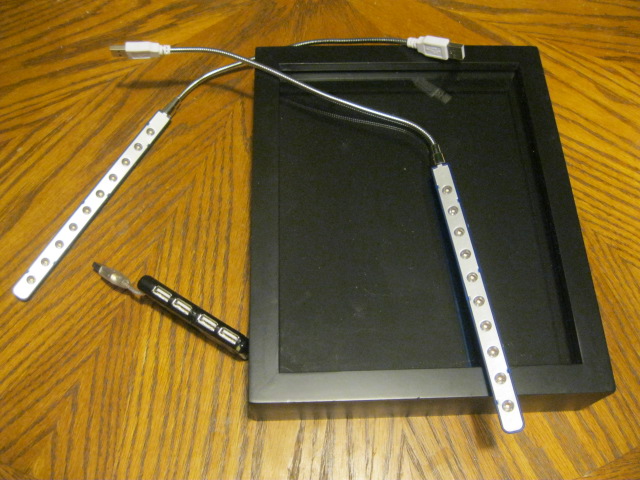
Part of this was easy. We had a modestly-sized LCD monitor kicking around upstairs, so we just plugged that in, doubling his screen size. But to make his "computer" bigger still, we went low-tech to create something that looked like a computer screen but wasn't. I started with a relatively inexpensive shadow box from the craft store, a pair of inexpensive USB LED light bars (ordered through Amazon; they took a month to get here because they were shipped from China, but they were very inexpensive), a cheap USB hub, and a sheet of photocopier transparency "paper."


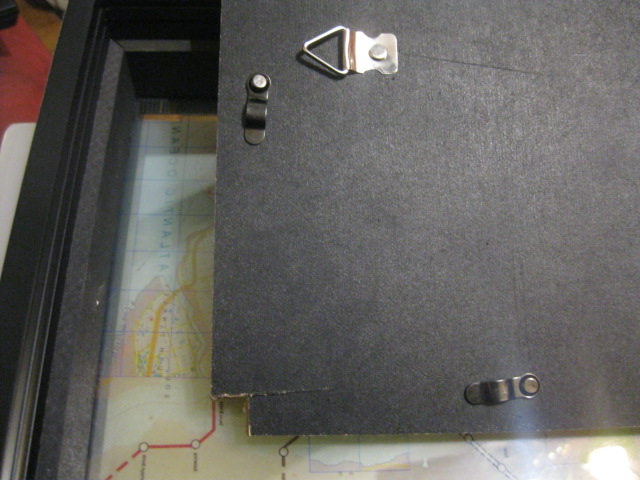
The cheapness of the shadow box was an asset here. Better kinds have a hinged front. For the inexpensive model, you have to take the back off, like a picture frame. That made it easier to cut off two corners of the back, making an opening just big enough in each for the light bar cables to run through.


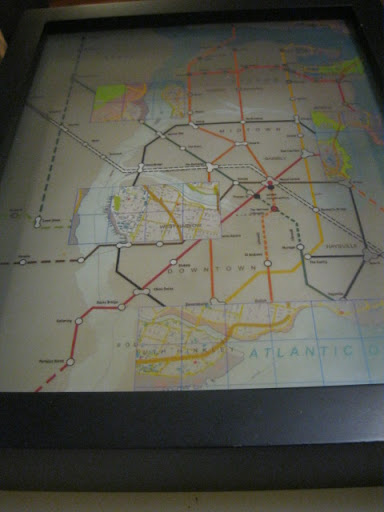
A coating of foil on the backing, a little superglue to hold the light bars in place, and a map of Gotham printed on the transparency sheet. The edges fit just under the frame quite nicely.


The base is even simpler. Two bits of a thick dowel fastened to a small wooden oval from the craft store. Paint black and attach to the "monitor" portion. Plug the USB cables into a small hub, plug that into a USB port, and there it is.

Sunday, January 29, 2012

Conventional decor

Yes, just some pretty pictures, from Stephanie's good friend Breadchick. They're pages from a calendar of old Batman covers, recycled as framed art.


The one on the left has the appropriate title "The 1000 Secrets Of The Batcave."