Wednesday, November 2, 2022

Cathedral Window


When I was putting together the new office, I had an ambition to do the outside-facing wall as a fake stone wall in more or less this style using painted styrofoam sheets. I ended up not doing so for a number of reasons (time and effort, fragility in a place where I'd be moving in some bulky furniture, etc.), but I still liked the idea. This came up again as I was looking at the end of one of the cabinet sections. The prefab cabinets have nice wood facings, but the sides are particle board. 

Ugly, but less expensive if you're lining up a bunch of them. If they're not entirely sandwiched between walls, you can buy a separate facing to put on the one at the exposed end. but we can do better than that, can't we?

My basic idea was to turn that end into an illuminated window with a pointed arch using a strip of LEDs for a light source. I've got them kicking around, so why not? Step one was to get a suitable design for the window proper and get that together with the 3d printer. I sized it sufficiently large (about 15 inches from top to bottom) that I had to print it in two parts, running out of filament half-way through printing part two.

No matter; everything's getting painted anyway.

Step two is getting the basic structure of the wall it's going on set up. I got a suitably sized piece of thin plywood and sketched out where I wanted the window to appear.

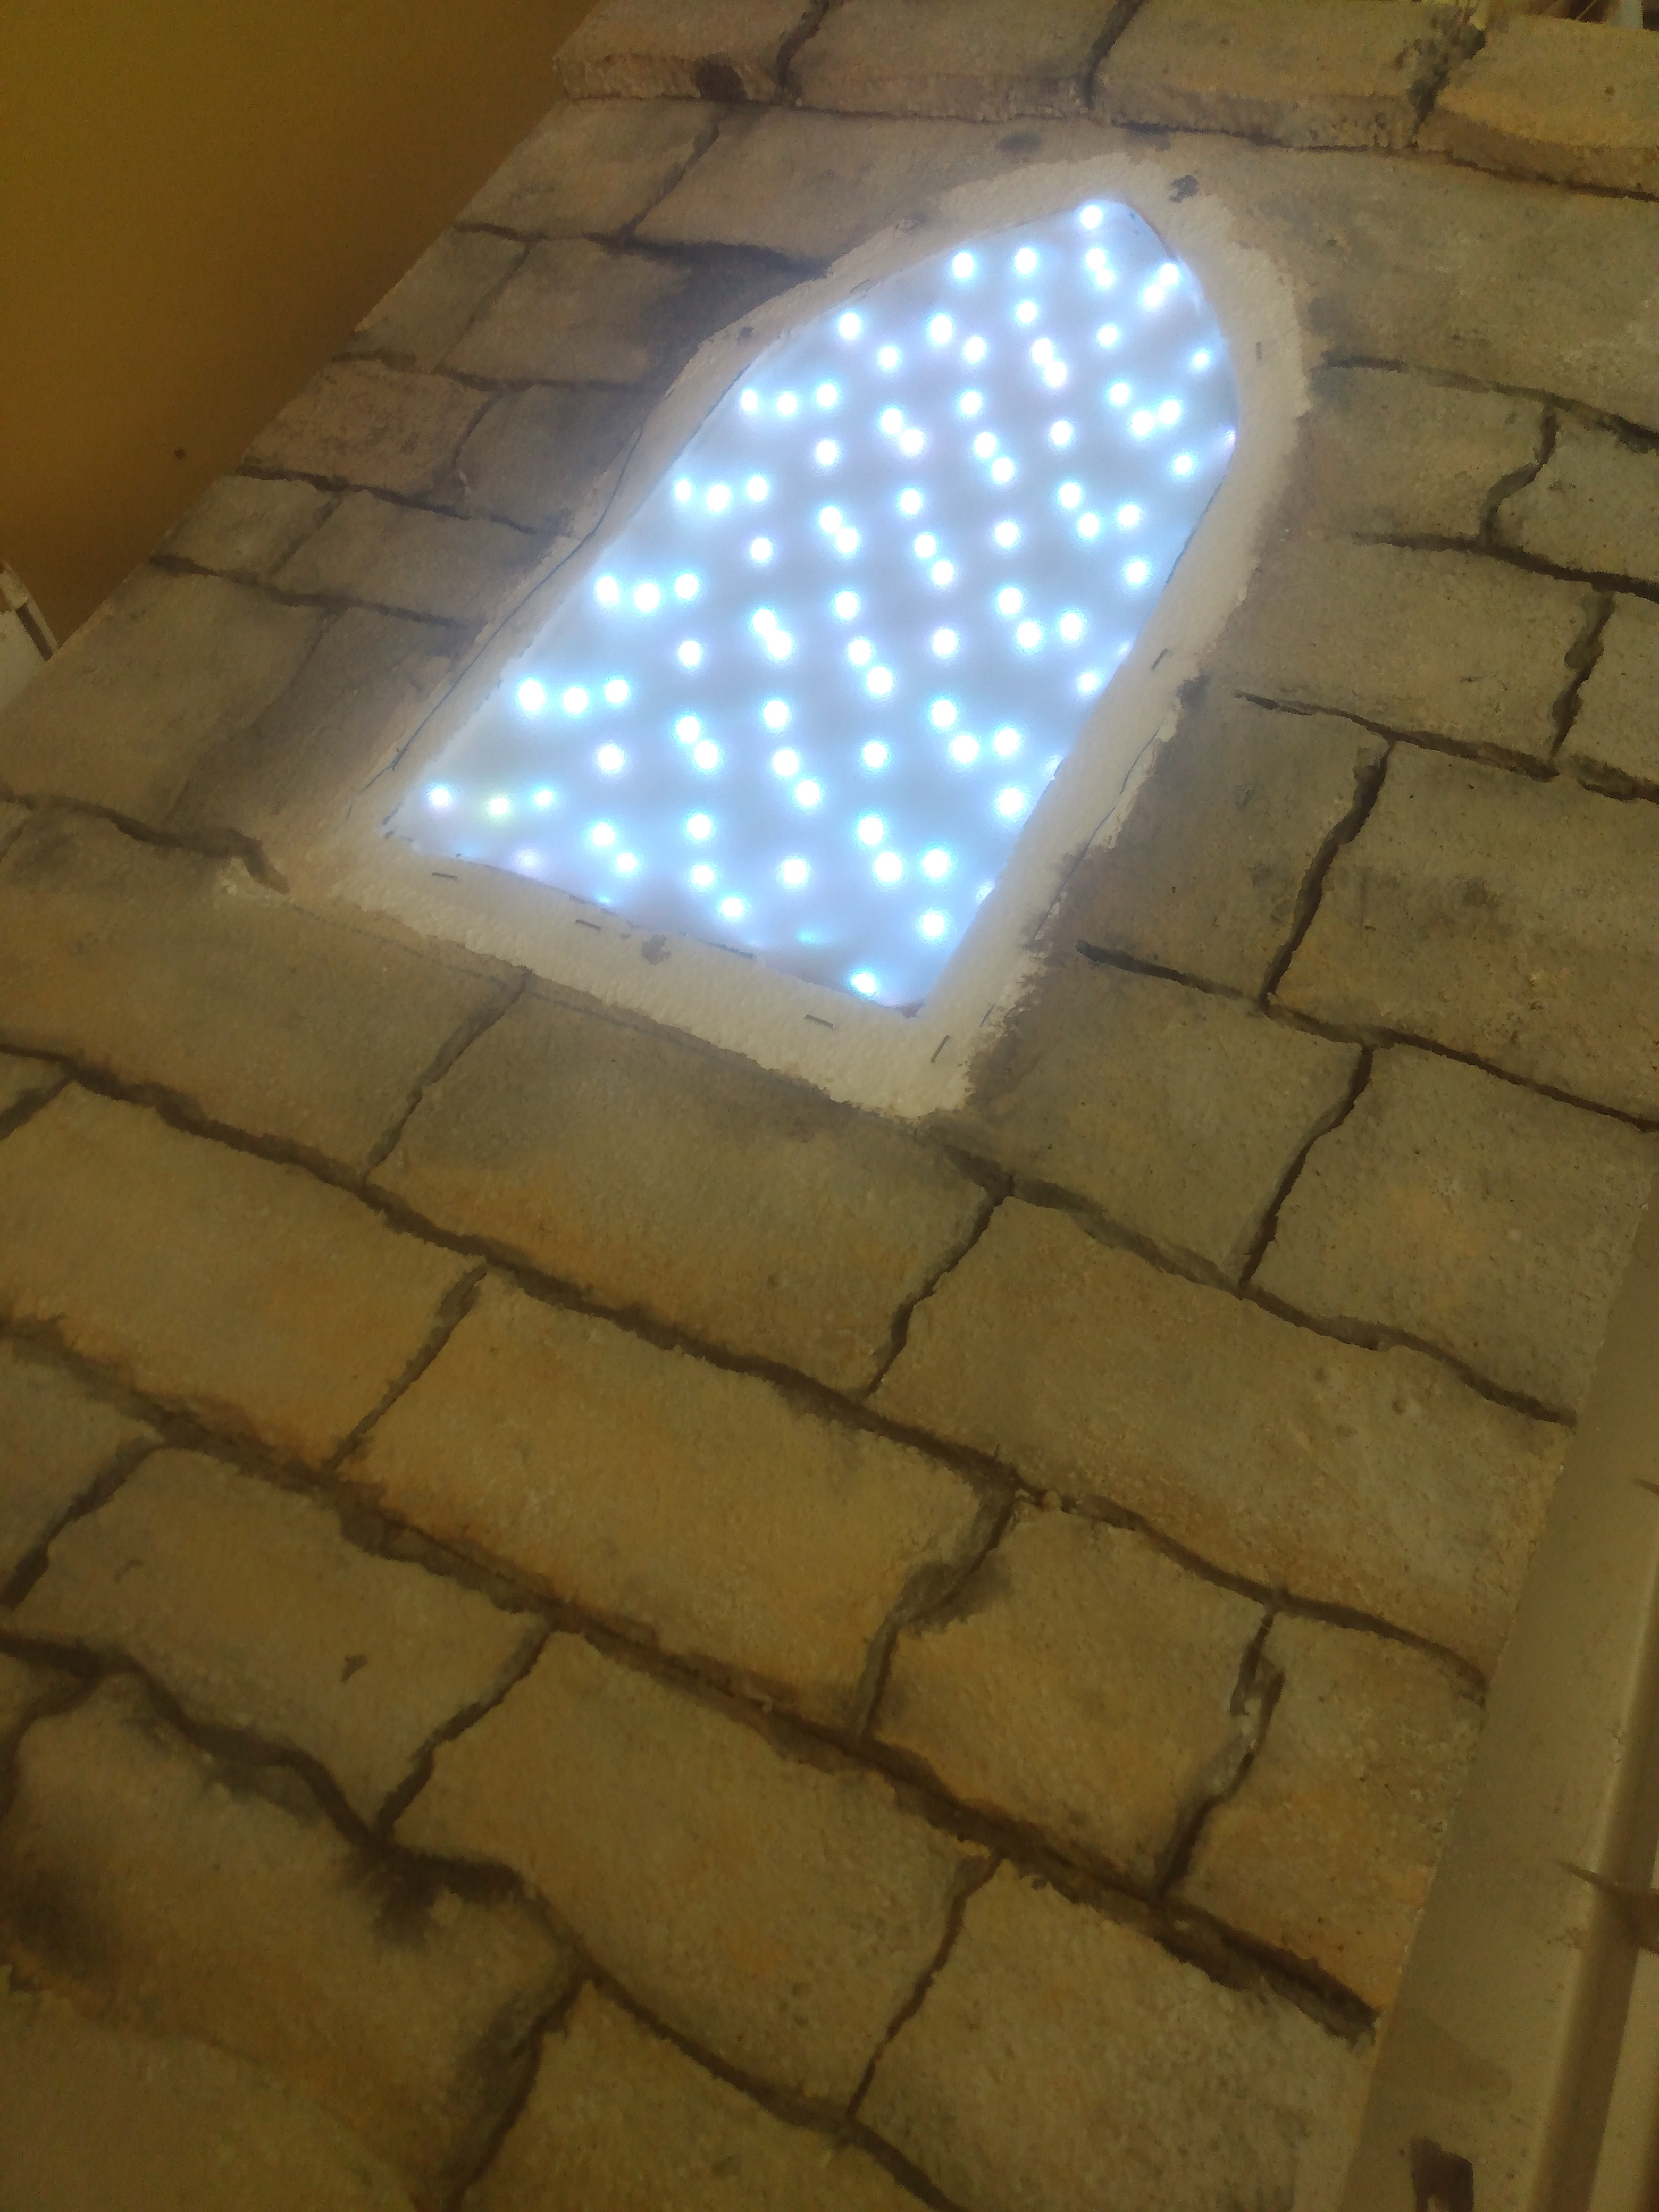
Then I started cutting up some sheets of foam to fit. The window frame made a good template to cut through the foam down do the wood.


With the basic shape set up, laying down the strip of LEDs was next, turning back and forth within the window space. The strip actually starts at the bottom corner so that it can be plugged in.


They were bright enough that they shone through the unfinished foam. While it's all getting painted, I covered the section of LEDs from the edge to the window with a strip of foil before gluing it all down with foam glue.


Next came roughing out the pattern of blocks. Like that video linked above suggests, it's a good idea to do that in advance with a little thought rather than freehand it. I also cut out a frame and a few other bits to become "stone."


This is the messy part: cutting grooves. I used a Dremel with a wire brush attachment. Absolutely marvelous for cutting through foam sheets, but incredibly messy.


On to painting. This is after a pass of a light brown base coat, a little sienna on the lower edges of the "blocks," and a little green on the upper edges.


Followed that up with a somewhat diluted light gray and a wash of very dark gray to fill in the cracks. I found, as I often do, that my washes end up everywhere, not just where they're supposed to settle in, and there were several passes of wiping down the elevated parts and doing more passes of lighter colors where the wash bled in too much.


With that out of the way, it's time to mess with the lighting a little. A few sheets of a translucent but not entirely transparent plastic serve to soften the points of LED light.

(I experimented with a stained glass pattern behind the window, printing out a colored design on transparency paper. Unfortunately, the plastic simply refused to keep the ink and despite repeated attempts and overnight dryings, it would smear at the slightest touch.)

One of the nice things about foam is that it's really lightweight. The frame was secured with foam glue and some pins. To get the printed frame on, I glued some heavy-duty staples to the underside and pressed it in.


This fit very snugly against the cabinet end, but it's not done yet. I left the top and bottom edges clear so I could drill through the foam and backing and screw the "stone" wall securely to the underlying cabinet face.

...and then pin top and bottom pieces to cover the unpainted sections.


Plug in, and turn on the light.


Or, to get fancy, set the LEDs to change colors.


So now my office labyrinth is accompanied by a Gothic window.


Wednesday, May 11, 2022

The Office

The house where we live is old (pushing 100 years at this point) and weird. Beyond the usual old-house things, where nothing is quite square or plumb and the 2x4s are actually 2x4 and not 1.5x3.5 and the wiring and outlets are insufficient, the semi-finished upstairs is peculiarly shaped. It doesn't have rooms so much as it has a series of connected room-like spaces with sloping ceilings (because it's just under the roof) and other oddities. When we moved in [uncomfortably large number redacted] years ago, we had plans for that space. We were going to build them out into actual useful spaces: an office, a guest room, a lounge, a library. And we made a start on some of that work. However, over time the upstairs became a default storage location. Not sure where to keep something? Put it upstairs. Most of those spaces ended up packed floor to ceiling with boxes and Rubbermaid containers. 

But a few months ago, we resolved to do something about it. We were going to reclaim the space and turn it into something useful, one area at a time. And the first space was going to be one designated to be my office.

Once I got all the boxes out, it looked like this:


It's about eight by fifteen feet altogether. The ceiling slopes under the roof, of course, so it's a bit over six feet at the highest, but mostly less than that. The room isn't well-defined because the space next to it more or less just opens into it. And there's an odd space divider built into the back of the room, with a closety area on the left and the right divided into upper and lower halves by a deep horizontal shelf.

So what does it look like now? Kinda like this:


Fresh paint, of course, a batch of new outlets bringing much needed power to the room. I got a batch of unfinished kitchen cabinets which provided a lot of storage and allow me to use a lot of the room under the sloping ceiling I couldn't otherwise use. I cut and finished some slabs of wood to serve as countertops and the desk surface, built shelves, and put in a number of little details. For example...

The area at the back of the room retains its original thirds, but the right-hand side is storage (long-term storage behind a useful triangle of whiteboard on top, a "tool shed" hiding my 3d printer among other things behind the accordion blind below. And the left-hand side behind the curtain got another desk surface, pegboard, a light, and a few other bits and pieces to become an arty workspace: 

Then there's the empty area of floor near the back of the room.


That design on the floor is a reproduction of the labyrinth at the cathedral of Amiens, possibly one of the easiest such designs to reproduce because it's all straight lines. It's a little lopsided near the middle, but it basically works, and it's well-sized for meeple pilgrimages.

There's memorabilia all over, since we conceived of the room as a sort of wunderkammer. This set of shelves near the back of the room houses, among other things, an astrolabe and a scientific balance dating to no later than 1947.

The cabinet next to that, to the left of the desk, houses a number of technical works, a couple of animals from Botswana, and a Cypriot icon. The icon is made from wood harvested from a forest burned during the Turkish invasion and was sold as a fund-raiser for refugees.

To the right of the desk, the tea station. Moroccan-ish tile, a small electric kettle, and (at the moment) a tea set from NCC-1701-D. Atop it, a small Cypriot vessel made in a style going back to the Neolithic (slow wheel, decorations applied after forming the main pot), an Acheulean-style hand axe I made from Napa county obsidian, and a souvenir from my time in Starfleet.

The other side of the room has the professional library, RPGs to the left, interesting and useful historical works to the right (both are a fraction of the whole library, of course; these are just key works). Memorabilia include a carved figurine I was given by my lovely and talented spouse and a kukri I picked up in Nepal. Most of the wall to the right, separating this room from the next, is new.


Between them, there are a few other bits. Above, there's a world map. If you look carefully at the pictures above, there's a small latch on the left. If you unlatch it, the map opens down to reveal a video screen.


Below that is the stone "mantel" (adhesive stone tile) and heater, an electrical heating element made to look like an iron stove. It'll be quite cozy once it gets cold again in, oh, November or so.


Natural light isn't great in that room despite the window, so it's supplemented by four lamps. I got some inexpensive Moroccan lanterns, did a bit of surgery to put light sockets into them, and hung them on the wall. And the fobs on the end of the pull chains? Dice.


And it's a bit subtle, but the ceiling has a scattering of stars. That thing just over the window is a page from a Buddhist text written in Pali on a leaf made from a disused monk's robe, stiffened with lacquer, and gilded.

It's a tiny space, then, but it's cozy, and there's room for a rotating display of memorabilia. But the next projects are furniture downstairs.