Sunday, July 7, 2013

A More Inclusive Axis


(This isn't quite a crafty thing. It implies craftiness, but that's really just printing out some scaled images and maybe gluing them to cardboard. But I couldn't think of a better place to put this, so here it is.)

I got Wonder Forge's DC-licensed Axis of Villains game, sold by Target as part of this summer's Justice League push. There are comic book fans in the house, and my lovely and talented spouse prefers cooperative games like Castle Panic, so I thought I'd give it a shot. From a game design point of view, there's nothing wrong with it. It's a cooperative game with simple mechanics: Villains, who come in sets matched to the heroes in play during any given game, move according to die rolls and special card draws. Heroes move to intercept them and beat a target number with a die roll in order to capture them and remove them from play. There's some nice chrome in the form of cards which allow the heroes to trigger individual special abilities; they can also "team up" and combine their rolls, necessary to defeat some of the particularly powerful villains. I give them credit for not underestimating the intelligence of children; they recommend the game for ages 8+, but I've seen games of similar complexity rated for 12+ or even 14+.


So far, so good. There's a problem with the hero selection, though. All dudes: Supes, Bats, Flash, and GL, the chick-free quartet DC has been pushing on their JL merchandise lately. This should be irksome to any right-thinking person, but it's particularly irksome to my Wonder Woman-loving wife who, if she's going to be pretending to be a comic book superhero, would like to play her favorite comic book superhero thankyewverymuch. But as someone who has been tinkering with fun but somehow unsatisfactory games since white box D&D (for those who weren't around for the early editions of D&D in the 70s, let me just say: uphill both ways, and get out of my yard), I can fix that problem.


To play female heroes, they need the same attributes as the existing ones: color, abilities, and villains. The villains are easy, at least as game pieces. Each hero has, mechanically, an identical set of villains. There are five villain pieces, covering the same range of values (odd numbers from 7 to 15), so it's just a question of attaching faces and names to the numbers. Special abilities are a little trickier, but not insurmountable. It's just a question of breaking down what the rules are and making tiny exceptions to them. The hard part, really, is the presentation. Color is tricky, but naming the villains has been harder. For some of these characters, it's not difficult to come up with a list of characters they've had long-term enmities with. For others, I've had a hard time coming up with a list of five bad guys distinctly associated with that hero and not already attached to someone else (consider the massive overlap between Gotham heroes and villains). The name of the villain is, game-mechanically, irrelevant, but if you're going to the trouble of playing, say, Huntress or Zatanna, you want to be fighting Mandragora or Felix Faust, not just "11" or "7." Where possible, I've provided a full list of five and suggested villain values. Where my knowledge of comics fails me, I've come up with powers in hopes that people who know more than me can fill in the non-mechanical details like villain names.

Here, then, are some other superheroes I've drafted for Axis of Villains. With these, you could play an all-female version of the game, or mix and match as you see fit. You'll need to make your own control pads, villain counters, and stand-ups for them using the ones that come with the game as templates, but the Internet is full of useful images. Good hunting!

(The following won't make any sense if you don't have the game, and I've had to invent some terminology anyway. Those of you who have played the game know that powers are keyed to two symbols on the control pads and power cards: a puffy impact cloud and a spiky explosion. Below, I refer to the former as "biff" and the latter as "pow.")

Wonder Woman
Color: White

Biff: Granter of Victories. When teaming up, if the villain's color matches any of the heroes', all roll two dice.

Pow: Golden Lasso. Select one villain in the same space or an adjacent one. That villain misses its next move. (Turn it face down to indicate that it misses a move, then face-up again after movement is called for in its sector.)

Villains:

Ares--15
Circe--13
Giganta--11
Cheetah--9
Dr. Psycho--7

Zatanna
Color: Black

Biff: Summoning. Move any villain in her sector to her space.

Pow: Pots! The villain she fights misses its next move, even if she loses the fight. (Turn it face down to indicate that it misses a move, then face-up again after movement is called for in its sector.)

Villains:

Brother Night--15
Poison Ivy--13
Felix Faust--11
Warlock of Ys--9
Dr. Light--7

Hawkgirl

Color: Orange

Biff: Battle Rage. If she loses in battle, Hawkgirl does not move back to the Satellite.

Pow: Nth Metal Mace. Hawkgirl may move any villain she fights back two spaces, even if she loses the fight.

Villains:

Hath-Set
Shadow Thief
Kite-man
The Monocle

Huntress

Color: Purple

Biff: Crossbow. Huntress may attack any villain in an adjacent space.

Pow: Motorcycle. Huntress may move up to four spaces farther than shown on the movement die.

Villains:

Mandragora
White Canary
Yasemin
Sicilian Mafioso

Oracle

Color: Glow-in-the-dark lime green


Biff: Coordination. Other players may use their powers during her turn.

Pow: Advanced Planning. When a <<>> card is to be drawn, draw three, select the one to be used, and return the others to the bottom of the deck.

Vixen

Color: Orange and yellow stripes


Biff: Eagle flight. Roll the movement die twice and take the higher number.

Pow: Rhino charge. Select a villain whose space she moves through during her turn and push it back to the outermost ring.


Saturday, June 29, 2013

iPlume

Did Thomas Jefferson write the Declaration of Independence on his iPad using a plain old stylus? Did Jane Austen compose her novels with her fingers on her Nexus's screen? Of course not! Cheap styli for use with touchscreen devices are a dime a dozen, but they lack elegance. My solution: the iPlume.


Making your own stylus for a tablet with a capacitive screen is absurdly easy. You want a soft (so you don't scratch your screen), conductive tip such as a bit of kitchen sponge and a conductor which connects that tip to you. The form doesn't really matter. It could be an armored gauntlet, a door key with a sponge stuffed through the hole, or a bit of ScotchBrite held with a set of metal tongs. I used a quill.

Though one can use a sponge, I didn't. I got a bunch of dirt-cheap styli off of Amazon (took a few weeks to get here from China, but the cost me pennies each) and pulled off the conductive rubber ends. The black rubber struck me as classier than ScotchBrite yellow. I prepped the quill by snipping off the tip to a point where it was a little narrower than the rubber end. I wrapped some brass wire around the shaft of the feather as a conductor, stretched the cup-shaped rubber tip over the end, and used a few drops of superglue to secure everything in place. Works absurdly well.


Wednesday, May 29, 2013

Another Victorian-esque Drive


Similar approach to the last one: Start with a small block of wood (this a little section of 1" x 2" lumber), hollowed out with drill and tiny router bits. There's an additional hole in the top, drilled with a half-inch drill bit. The whole thing got stained and coated with shellac.

The half-inch hole got filled with a large-sized clothing grommet lined with a little square of brass cloth. The leather upholstery on the sides is cut from a disused glove and nailed/superglued in place. The gear is from a bag of old watch parts, while the corner piece and the "crank" are fashioned from scrapbooking and cheap jewelry pieces from the craft store, superglued in place.

After the drive was epoxied in place, I traced around the end of another USB plug on a scrap of wood veneer (collections of assorted samples are available cheaply on-line from veneer suppliers). Cutting the outline with an Xacto knife, I had a bit of veneer with a hole that fit snugly around the plug. Putting that on the end of the drive, I then traced around the end of the casing, removed it, and cut around the outline so it matched the dimensions of the casing as well. I found that sticking a bit of masking tape on the back while I was cutting greatly reduced splitting. Then I put it back on, glued it, and finished it with matching stain.

The nice bit about this one is that the amber LED attached to the drive, visible through the grommet, is designed to slowly fade in and out while the drive is plugged in. It gives a nice warm light reminiscent of a tube radio, which the finished casing vaguely resembles.

Saturday, May 18, 2013

Brass and wood thumb drive

So I made a decorative thing out of an old thumb drive. This is the less interesting side.


The electronics, such as they are, are cannibalized from an old thumb drive. They're cheap, and the case can be pried off easily with a screwdriver or cracked with pliers, leaving you with a circuit board attached to the USB plug itself. The whole thing's about the size of a stick of gum.

The heart of the case is a section of 3/4" wooden dowel. Most of the work on it was done with a Dremel drill press and a bunch of different bits. To make space for the drive, I drilled a bunch of holes in the end, more or less outlining a rectangular hole. A lot of material was removed by that alone, but I enlarged the hole with the aid of some router blades and a few others. By the end, it was nearly just a thin wooden shell.

The bands around ends are from a short section of copper pipe, removed with a pipe cutter (maybe $8 at your hardware store). Since they almost-but-not-quite fit over the ends of the dowel, I used a sanding/grinding bit around the ends of the dowel, shaving down the diameter just a bit, until the copper rings fit. The dowel was prepared for the other metal fittings by a lot of drilling, from tiny, tiny bits in the drill press for the parallel wires to a 3/16" bit (attached to a full-sized drill) for the top "window."

Once all the holes were drilled, the dowel got a coat of dark stain and then one of polyurethane to seal it. The various bits (decorative square brads and long bronze-ish pins from the craft store, a small grommet from the fabric store, and the aforementioned copper rings) were put in place and secured with garden-variety cyanoacrylate. The only unusual bit is that the grommet "porthole" has a layer of woven brass "fabric" behind it. I cut a tiny square, a bit larger than the diameter of the grommet itself, snipped off the corners to make sure they wouldn't project as much, and pushed the grommet through the hole in the dowel, wrapping the fabric over the end and helping wedge it in place.

The bullet end is made from a plastic gear (ordered in a large, cheap bag years ago) painted copper and secured by nailing a decorative tack from the hardware store into the end.


And when the drive is in use, you can see a bright red light through the porthole.

Friday, April 13, 2012

Ogre Mk. V

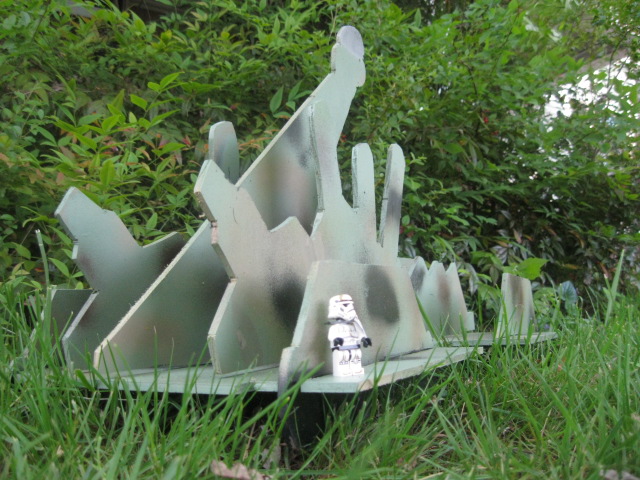
One of the niftier features of the designer's edition of Steve Jackson's classic wargame Ogre is the 3d Ogre designs, constructed from punch-out chipboard shapes.


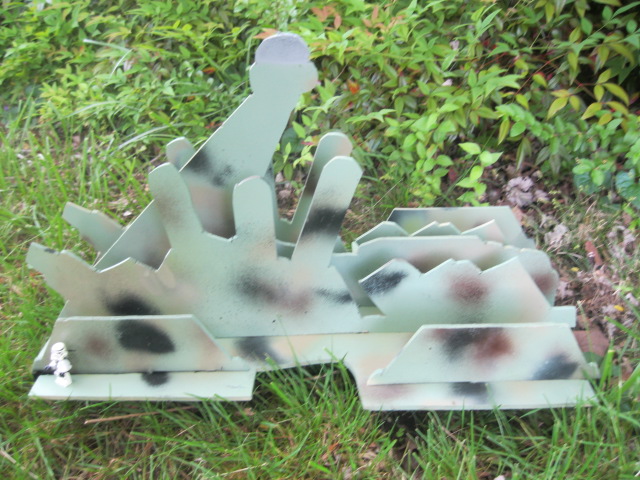
As one of the stretch goals of the Ogre Kickstarter, reached absurdly quickly, they provided blank Ogre templates you can print out, decorate, and build yourself. But I thought "If I want a really big Ogre, I can do better than that..."

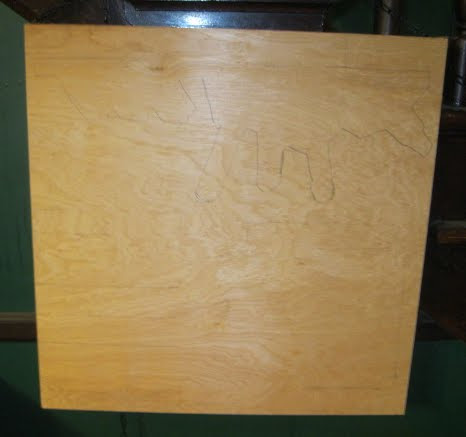
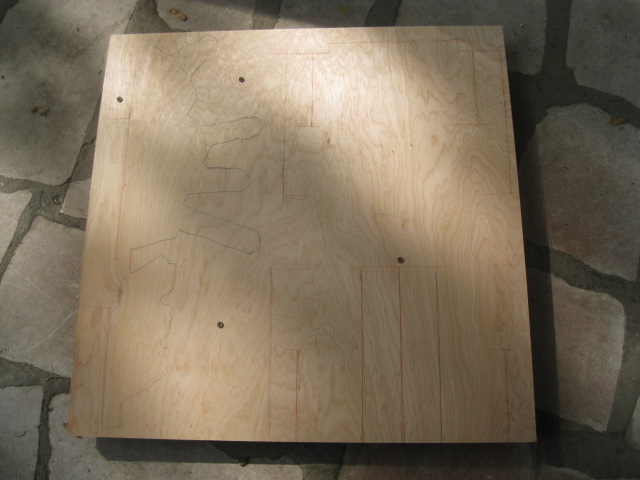
I started out with more 2' x 2' sheets of the quarter-inch birch plywood I used for the Batcave fan, a pencil, and a small art projector. Not cheap, but vital for this sort of thing. From a distance of about five feet, it magnified the largest piece of the Ogre to about two feet wide. Tracing the lines wasn't easy, given the slightly wobbly board I was working on and my utter lack of ability to draw a straight line.


Indeed, I went back over the forms with a straight edge and a red pencil.


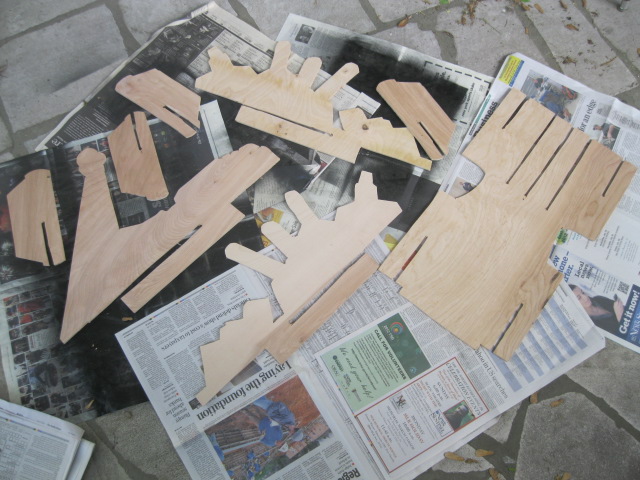
After clamping and screwing a few sheets of plywood together (so I'd have multiple sets of Ogre parts to experiment with), it became a simple matter of sawing things out. The only tricky bit was chopping out quarter-inch channels to fit the pieces together, which would be a lot easier if I had a router table.


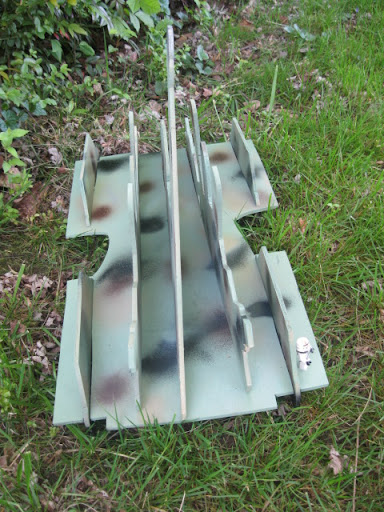
And after that, it was an even simpler matter of painting (light green base, spritzes of other colors to give the impression of camouflage) and then assembly. The finished Ogre is about two feet long and...well I haven't measured it, actually, but probably something over a foot from treads to the top of the conning tower. That's a Lego stormtrooper for scale.


Sunday, March 25, 2012

Fan

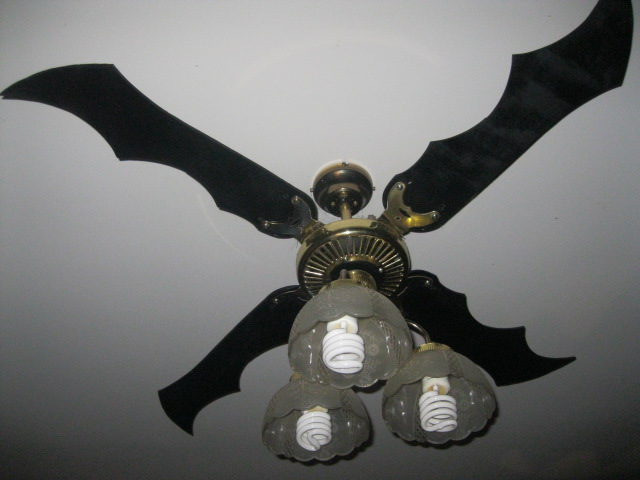
Alex has a ceiling fan. It's a typical ceiling fan, which is fine, but not very Batcave-like. So we decided to replace the blades with something a little more bat-themed, like what this guy made.

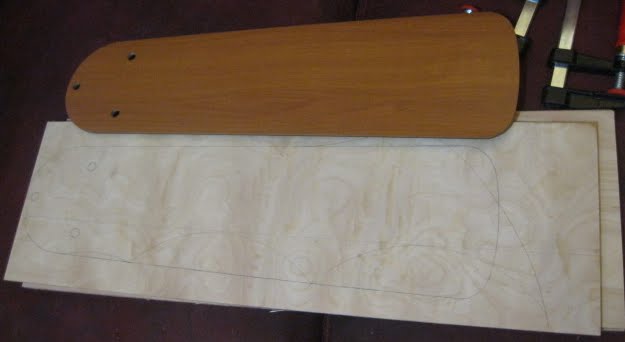
I got the recommended quarter-inch birch plywood and cut it into strips, then traced a fan blade onto one of them to get a general shape and size. The various curves defining the not-conventional-fan-blade bits of the fan blade were traced out using a dinner plate.


Once I had the basic design down, I stacked up the birch plywood strips, clamped them together, and started cutting with the remarkably versatile jig saw. I had to move the clamps around a few times to get access to all the places I needed to cut while keeping the stack together. After that, I drilled the screw holes, and painted.

The toughest part of this was installation. Because of the ten-foot ceilings, I was on top of a ladder trying to avoid rattling glassy fixtures to get the dusty old blades off and the new blades on. But it's worth it.

Sunday, February 26, 2012

Clock

We wanted Alex to have a clock with hands that fit the theme of the room, but we couldn't find anything that quite worked for us, so we decided to build our own. The clock mechanism proper is an inexpensive battery-powered job from the craft store, but we had to make the face.

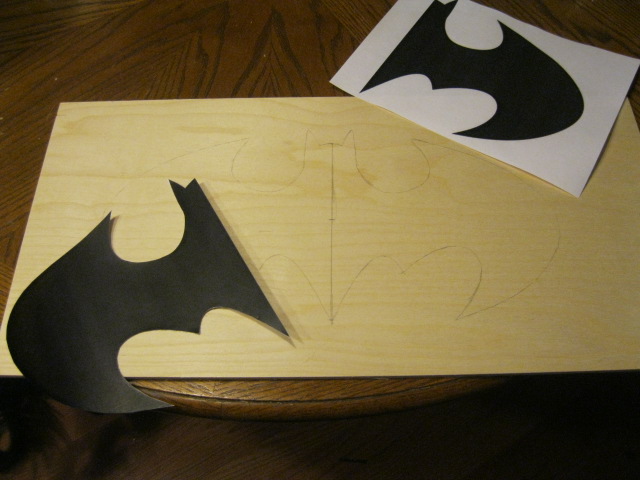
I started by enlarging a Bat symbol and printing it out (splitting it over two sheets of paper to get it to the size I wanted). Cut out, and trace onto a thin piece of wood:


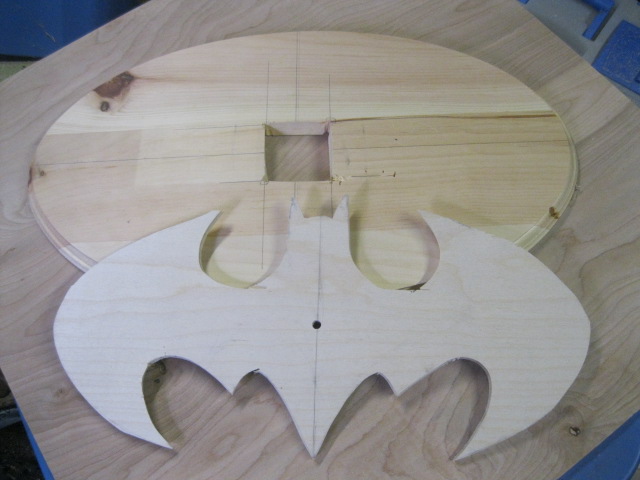
The jig saw did a surprisingly good job of cutting out the bat shape. I thought I'd have to rough it out with the jig saw and then finish by hand with a coping saw, but the power tool was able to do it all to my satisfaction. I put a hole in the middle for the center of the clock. Then I got a big oval wooden piece from the craft store, found the center, traced the clock body around it, drilled holes in the corner, and used the saw to chop out a space the clock could fit through.


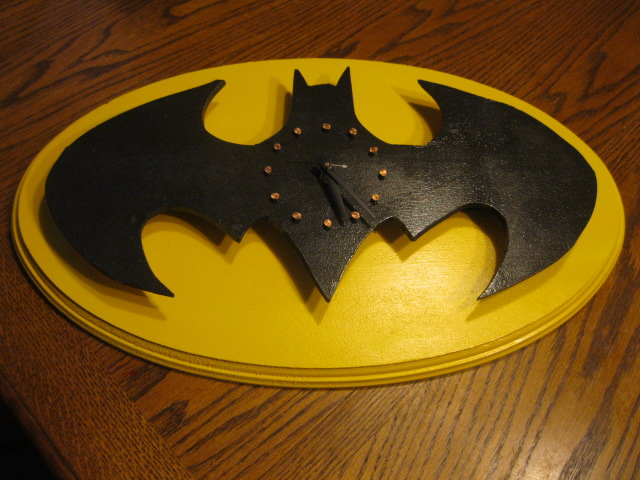
Using a protractor, I marked spots at 30 degree intervals at a set distance around the center of the clock and drilled small holes for later reference. The oval got a coat of yellow paint and the bat shape got black. Added copper nails in the little drilled holes, installed the clock behind the bat piece, then attached that to the oval. The battery can be removed through the hole cut in the center of the oval. This is the finished clock:


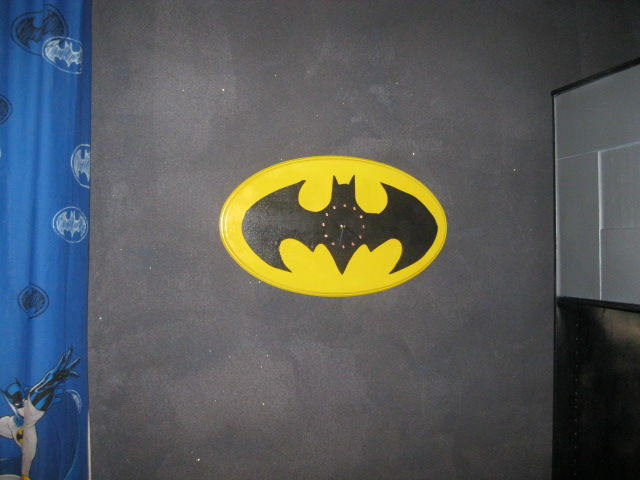
And here it is on the wall: