Tuesday, December 30, 2014

Hollow Book


Certain persons I am married to wanted external digital storage, but a hard drive or thumb drive is kinda dull. I decided to hollow out a book to hide an external hard drive in. This is actually really easy if you've got a few common power tools.

For this project, here's what I used:

Materials
  • useless old book
  • thin plywood
  • screws longer than the book is thick
  • glue
  • foil or wax paper
Tools

How To Do The Thing

Start with a book you don't want. In my case, it was a collection of sermons published in 1902, which I picked up for free from the discards bin at the local used book store.


Cut out two pieces of plywood to approximately the shape and size of a page of the book. Sandwich the pages to cut between the pieces of plywood and clamp in place.


Outline the space to cut out. I'd try to leave at least a half-inch margin around the edges, but you may be more daring. Drill a couple of screws through the pages in the part to be cut out and remove the clamps. Get heads of the screws as close to flush with the wood as possible. The screws will hold the pages together (that's key to the whole enterprise; the drill and saw will cut the pages easily, but you need clamps and screws to keep the whole thing from flying apart and tearing), but you want them out of the way for when you cut.


Drill out the corners of the space you've outlined to cut. You want the holes to be big enough to fit the blade of the saw into. I used a half-inch bit, which is more than generous.


Put the drill blade through one of the holes and start cutting along the outline. I used a bench vice to hold it in place during cutting, and extra clamps around the edges just to be sure things didn't come apart. You can never over-clamp these things. The center should come out in a nice, solid block.


Dilute the glue with some water for a brushable consistency and brush the inside cut edges. Insert sheets of foil or wax paper between the block of glued pages and the covers, weight or clamp lightly, and let dry.


Once the glue had dried, peel off the foil/wax paper. You now have a hollow book ready to use. For example, to put a USB external hard drive in.


What I did differently from a simple program of "hollow out the book" here was:

1) Cut out about half the pages rather than all the way through the book. This gave me a platform to run a string through, to hold the drive in place.

2) Slice a notch into one edge with an Xacto knife to make a channel for the USB cable.

Thursday, October 2, 2014

The Secret Origin of the Wonder Woman (Cookie Cutter)

When I was toying with the idea of getting a 3d printer, I discovered that one of the main feedstocks used by home printers is a food-safe plastic. Indeed, PLA (polylactide) is made from starches and used for lightweight food containers. Our household being what it is, it was a quick jump from there to the realization that, with a bit of work, I could make just about any cookie cutter we could come up with a design for. It's just a matter of taking a 2d outline and extruding it through a third dimension. I mentioned that to my lovely and talented spouse. A 3d printer was ordered that day.

It turns out that figuring out how to go from design to cutter is actually kinda complicated, even when you've dealt with the non-trivial task of figuring out just how to make a 3d printer work. However, one can work out a pretty clear path. Here's how I do it:

Starting With a 2d Image

You need a very clean black-and-white line drawing of the image you want to turn into a cookie. The only thing you should have is the outline of the pattern you want to see: no shading, no suggestion of height or depth. You may be able to outline areas which you will later shade or otherwise model, but those features aren't part of the shape you're defining in the cutout. And the simpler the image is, the better. You're working in a medium which doesn't give you great resolution. Logos and individual letters are fine, but trying to do, say, faces or long strings of text is asking for trouble. For the Wonder Woman cutter, it started out something like this:


There are some limitations on the complexity of the shape you can use here, though I haven't quite worked them all out. Software downstream seems to object to concentric closed shapes, for example, so particularly complex items may need to be done as separate images to be reassembled elsewhere. For this cutter, the goal was to cut out the big winged-W shape and make an impression of the inner lines without cutting all the way through. This meant inner and outer portions at different heights, so I had to separate the outside W from the internal lines and process and print them separately, like this:


There are also issues specific to cookie cutters to wrangle with in design: particularly acute angles and narrow spaces will print just fine, but as with any other cookie cutter, the dough may not want to come out, and pointy bits cook faster and can brown or even burn before the center of the cookie is cooked through.

Anyway, save this as a .jpg, .png, or whatever other bitmap format you prefer.

Bitmap to Vector

The next step is to convert the bitmap, which is a bunch of individual dots on a grid, to a vector graphic, which defines relationships between a smaller number of points and is more scalable. I use Inkscape for this. Here's what to do:

0. Set the scale. It's important to use consistent units of measurement across programs. I set the unit of measurement to millimeters.
1. Use File-->Import to get the image into Inkscape.
2. Select Path-->Trace Bitmap to convert the bitmap image into a bunch of paths.
3. From the palette on the left side of the screen, click on "Edit paths by nodes" or just hit F2. This puts you in a mode to edit the paths.
4. Hit Ctrl-A to select all the paths.
5. A little up from the "Edit paths" button from #3, click the "Insert new nodes into selected segments" button at least once. That'll establish more points along all those curves. That's important, because in the next step, you'll...
6. Right along the palette across the top of the screen, click on "Make selected segments lines." Turns out OpenSCAD, the software we're using to turn the .dxf into a .stl, hates curves. Adding more nodes in #5 preserves detail you'd lose otherwise.
7. Save the drawing as .dfx


Vector to .stl

I use OpenSCAD to take the vector drawing and project it a bit through a third dimension to produce the basic cookie-cutter shape. Launch OpenSCAD and, in the panel on the left, enter a command like this:

linear_extrude(file = "filename.dxf", height = mm, center = true, convexity=1);

Replace "filename.dxf" with the path to the file you want to convert and mm with the desired height of the extruded shape in milimeters. If all goes well, you'll see a rendered version of your shape appear in the panel on the right. Select File-->Export-->Export as STL to create an STL file with your now-3d shape.

Use in Sketchup

This step may be optional, but you can use Sketchup to combine multiple .stl files, add other items based on simple geometric shapes, and otherwise refine your design. Before you start work, you'll need to go to the Extention Warehouse to get a plug-in which will allow you to export .stl files as well as import them. Once you've done that, open a template which works in millimeters; later exports may not work as you expect if you chose other units. Import your .stl file, which will appear on the origin. You can move it around, rescale it, add other objects, and so on, then export to .stl when you're done.
 
For example, for another cutter design (the Green Lantern logo below), I used it to add a very short but wide cylinder as a base for the cutter, necessary to keep all the bits in the middle in place, and a circle the same height as the logo I was working with to define the shape around it.


For an initial pass at this cutter, I rendered the inner and outer parts at different heights and combined them into a single .stl, with the goal of cutting (with a taller outside piece) and embossing (with a shorter inside piece) with a single object. That didn't work out so well. It printed just fine, but the dough ended up sticking to the cutter excessively, so ultimately the cutter didn't work and I had to go with printing the rendered inner and outer .stls separately.

Print

The biggest problem I ran into during printing was that the cutter is a very wide shape, which created the classic problem of curling. The edges and center cool at slightly different rates and upper and lower layers are likewise at different temperatures. For a sufficiently long/wide but thin object, like the base of a cookie cutter as it's being printed, this means that the edges tend to pull up and way from the print bed. Putting a layer of blue painter's tape on the print bed is the first line of defense here. The plastic usually sticks to it well, and it saves you from having to chisel it off the print bed if it sticks TOO well. The problem I was running into, though, is that the plastic sticks to the tape perfectly well, but the curling is so strong that it starts to pull the tape off the print bed! I switched to a stronger brand of painter's tape (3M's exterior tape), which stuck well to the print bed, but the plastic wouldn't stick to the tape at all. However, once spritzed with some cheap hairspray (unscented Aquanet), it worked just fine. There was the slightest bit of curling at one edge, but it was essentially unnoticeable.

Results

This is the finished cutter set (with a Green Lantern design off to the side):


While I had hoped for a single-operation cutter, the two-part solution allowed us to cut the cookies and make a good impression with them without excessive effort. The cut was clean and the impression broad enough to be nicely visible after baking. Were the cookies themselves good? Well, Wonder Woman seemed to like them.


Sunday, August 3, 2014

Blood and Souls For My Lord Hairioch!

Certain persons to whom I am married have very long hair and use hair sticks to keep it on order. Said persons have also long wanted hair sticks that double as weapons. And I thought, "Hey, with the 3d printer, I could do that."

I started by putting together a simple axe-head design in Sketchup. It's flat on the bottom, so I can produce two mirror-image pieces and glue them together. They also have a sort of tang with a 1/8" diameter.


Printing was pretty easy, with a little adjustment to make sure they didn't overflow the available print area or anything.


For the sticks themselves, I bought a dozen cheap wooden hair sticks off Amazon. They came pre-drilled, but the hole wasn't big enough for the axe head, so I got out a 1/8" drill bit and enlarged it.


From there, it was just a simple matter of gluing, painting, and inserting. Here they are along with another I made from a sword design I downloaded off Thingiverse as a spear head.


Tuesday, July 8, 2014

New Toy, and the Wizard's Tower


So, yeah, got a new toy: a Printrbot Simple 3d printer. I've been curious about that sort of thing for a while, and when it became apparent that I'd be able to use one to produce custom cookie cutters, it went from "interesting" to "order one now."

I haven't made the cookie cutters yet. I've spent the past couple of weeks experimenting and learning how to use both the printer itself (as much an art as a science) and the modeling software to make printable designs. But I've got a viable design, and I've put together some useful stuff in the process, which brings us to this stuff right here.

We play a lot of Castle Panic at our house, to the point where the board, cards, and pieces are showing serious signs of wear. While poking around over at Thingiverse, I ran across some Castle Panic game pieces and the extra pieces from the wizard's tower set. It was obvious I had to make some of those, both for inherent niftiness and to save wear and tear on our increasingly frayed bits of cardboard.

Most of the pieces I just sprayed with a bit of stone-texture paint (see down at the bottom), but I wanted to do something special with the wizard's tower, seen here shortly after printing.


There's a little window just below the turret. I thought that might go nicely with a light. After figuring out more or less where the center of the bottom was, I got out a half-inch spade drill bit and started boring a hole in the bottom where it's thickest. After a couple of inches, I switched to a quarter inch bit. Weird observation: when the PLA plastic I'm using gets hot because of the friction from drilling, it gets gummy.


 Through luck or good planning (it was luck), the bit poked a hole at the bottom of the window, just barely visible here.


From there, it was simplicity itself to give the tower a spritz of paint (in something contrasting the stone-textured walls and other towers), attach a couple of wires to a small LED, stick them down the hole through the window, and tape the other end to a couple of tiny hearing aid batteries. This is what the final setup looks like:


My new toy. Is much fun.


Sunday, June 22, 2014

Heaven-And-Earth Lamp


Seemed the right name for this steampunkish lamp. Like the previous one, it's mostly made from PVC pipes, primed and painted copper or aged bronze. However, I wanted to balance the mechanical look with something organic.


So it supports a small terrarium. It just happens to be almost exactly the same size as the bulb on the upper end. And, of course, there are the usual bits of gearing and gauges and such.


The thing about this lamp is that it's very, very big but provides very little light. I could hardly fit it in the photobox, yet it only has a 40w bulb. Is OK; it's a curiosity anyway.


Friday, March 21, 2014

Astrolabe Notebook

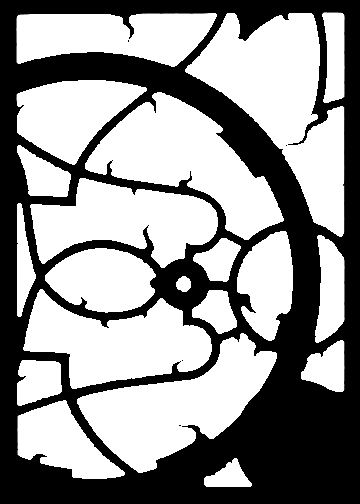
I like historical scientific instruments. I've got a small collection of reproduction items and a few authentic historical items from the mid-20th century. I particularly like astrolabes, with their swirling retes and the complicated arcs of the plates. And I thought it'd be a good theme for the cover of a notebook.


I started with a 5x7 hardcover, spiral-bound notebook. I took the image of an astrolabe rete, extracted a 5x7 section of it, and converted it to black and white for the silhouette.

I pasted it to a double-thick piece of old file folders, the two layers also glued together, and cut out the shapes with an X-Acto knife. Painfully slow, that was.

Once done with that, I sprayed it gold, then gave it a faint haze of brown to give it some age.

For the plate section, I cut out a 5x7 piece of foil-faced paper and drew a bunch of arcs on it more or less at random with a silver marker. The marker was far too large to fit in the compass, so I had to wire them together.

With both pieces done, I stacked the two pieces together. The foil piece was a little bigger than the cardboard rete, so I had to trim it down a bit.

To prepare the piece for a little more dimensionality, I drilled a quarter-inch hole in the bottom corner.

That was just a preparatory step, though. To make sure everything would line up, I glued the foil paper to the notebook, then the file folder layer to the foil.

For the center, I nailed a hole through all three layers and used a fancy paper brad in the center, then glued a plastic jewel to a piece of paper and glued that over the hole in the lower corner.

Finally, it was just a matter of putting a grommet through the hole in the lower left and covering it with a watch gear, through which the red jewel can be seen from the right angle, and cutting a notch in the upper right so another fancy paper brad could be installed.

Thursday, January 2, 2014

Seeing Things By Steam


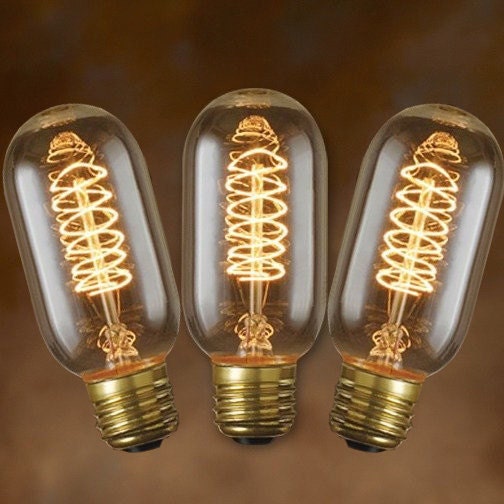
This is a really simple one. The pipes are a bunch of PVC piping fitted together into a pleasing shape, with wires salvaged from an old lamp run through them. The assembly was primed and covered with hammered copper textured spray paint. Once that dried, I attached the cords for the light ends to some standard pull-chain sockets (I liked the Bakelite-ish look), epoxying them in place, and wired the other ends together to a plugged cord with some wire nuts and electrical tape. Add the 40 watt Edison bulbs (below) and it's ready to roll.


The only bit that required more than minimal effort was the fake gauge:


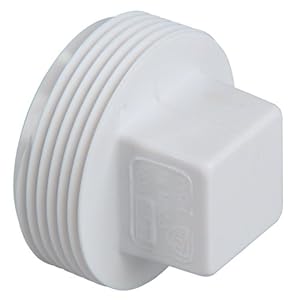
The body of the gauge is a PVC end plug:


I partly filled the interior with epoxy, printed out a gauge face dial based on an image I found on the net, put that in the plug with a bit of a needle for an indicator, and covered it with more transparent epoxy. I secured it to the lamp by drilling a hole through the back and screwing it in:


It's a nice decorative lamp, though the low-wattage bulbs means that it doesn't provide a lot of light, and it's sufficiently lightweight (a couple of feet of half-inch PVC pipe doesn't weigh much) that I might want to add a more solid base.