As a long-time gamer, I've played and continue to be involved in games which use hex maps, going back to Squad Leader and other Avalon Hill products. One of the earliest such games I played with the Metagaming/Steve Jackson classic Ogre, for which I've already done a bit of printyness. Having 3d cybertanks ready to roll is great, but what about the other units? The internet being what it is, somebody's already way ahead of me. The units are great, but can I add anything to that? Nifty as they look, they're missing something important for actual game play: stats. But that's easily dealt with. Whip up a hexagon of the appropriate size, extrude it into a suitable thickness, add a little 3d text around the edges, and drop the unit miniature in the middle.
One of the other games I'm into is the likewise Steve Jacksony RPG GURPS, which likewise uses a hex grid to regulate movement. Here, again, the internet's got my back, with these lovely floor tiles which could be used to build nice dungeons. All I have to do is to add some hexes, as in this test piece.
The problem here, though, is one which has plagued gaming map-makers for decades. People tend to build in rectangles, but maps are in hexes. The source tiles I'm working with are naturally in various sizes of squares and rectangles, and while I can lay down a hex grid of whatever kind I want on top of a batch of tiles, I have to decide between making either a geomorphic hex grid which doesn't make sensibly shaped rooms or a geomorphic square grid which ends up with a bunch of not-quite-hex-shapes around edges. Oh, well.
A desperate attempt to control the look of our everyday environment with precious little artistic creativity and no relevant skills.
Wednesday, February 18, 2015
Monday, February 9, 2015
The Factory States
So what is my robot printing?
Well, a guy over on the SJ Games forums had an idea about printing out the 3d Ogre standup sheets, created as part of the Ogre Kickstarter campaign, on clear plastic, producing clear Ogres where you only see the design, not the material it's printed on. I thought that was rather clever, and then realized that if I could extract the shapes from the graphics in the PDF, I could print out the shapes and assemble my own plastic Ogres. I got to the point of having .stl files ready to print:
And then I thought, "Hang on. I'm dealing with a 3d printer. Why am I messing around with 2d objects?" The goal became designing and printing a full 3d Ogre.
Design was largely an exercise in figuring out how to use Sketchup and what plugins I wanted to add in. Starting with some of the pieces in the "2.5d" design, there was a lot of use of the extrusion and scaling tools, and it all became much easier when I found a plugin that made geometric solids.
So far, so good. But printing was a problem. When I converted the design to gcode, Slic3r dropped significant parts. The conning tower, for example, simply vanished:
Why was it doing this? I had no idea. But on a hunch, I switched to different software for slicing and printing. Cura seemed to treat the design more as it was intended:
That looked more promising, so I sent it to the printer. And this is what I got:
This Mk. IV is about three inches long. I note that features smaller than about a half-millimeter may as well not be there. I may play with this a bit and add a few more surface features like some tread texture. I also want the conning tower to be a bit different in various ways, and the front part should have steeper angles. And at some point, I should build a Mk. V.
Monday, February 2, 2015
Instant Stencil
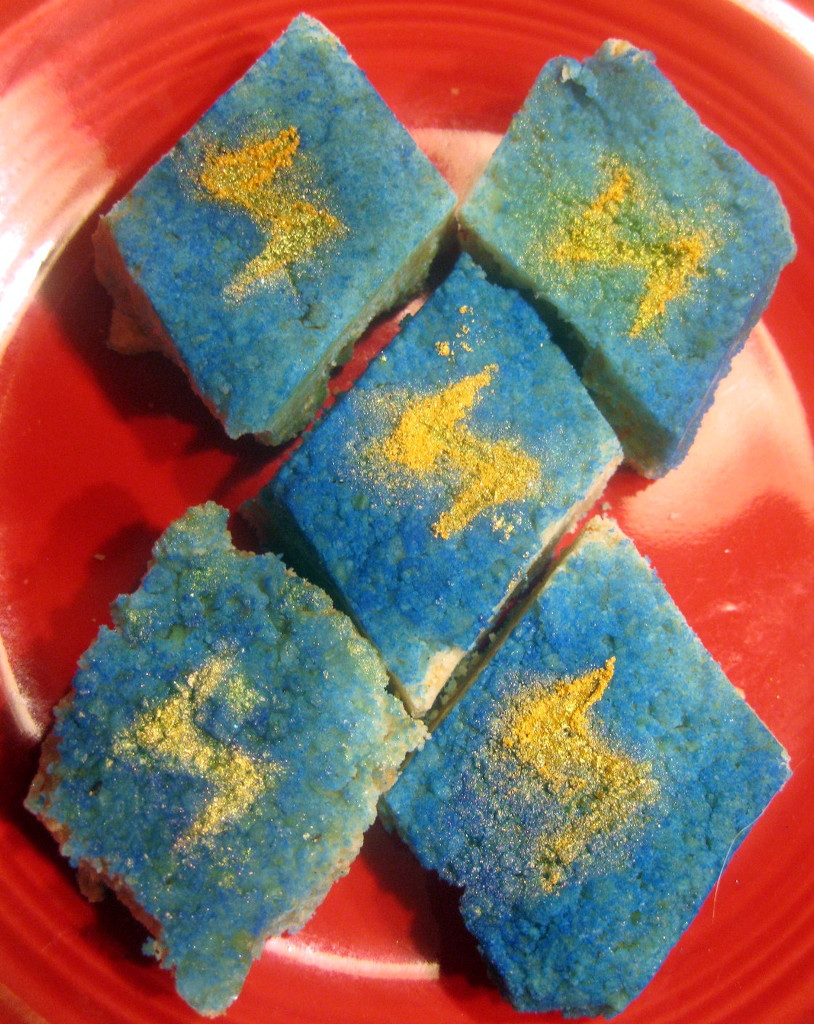
The 3d printer continues to subtly transform the way we do things around here. Here's the latest example: certain people I'm married to needed to paint a superhero logo (Ms. Marvel's, to be precise) on a dozen or so small confections (kaju katli; yum). We already had the can of (edible) gold spray paint and a container of (equally edible) gold dust, but we also needed a stencil. It's certainly possible to do that with, say, paper or cardboard, but there are problems. Regular paper? Easily soaked through after a use or two, and at any rate floppy. Cardboard? Still a limited number of uses, one has to find the right kind of material (which means digging around for...well, you're not really quite sure what), and there's an inverse relationship between ease of working and durability, so even with some reasonably good material I'd probably have to cut two or three.
Enter the printer. The PLA is non-toxic, and it's easy to make the design. I fired up Sketchup, drew a square about the size of one of the pieces of kaju katli, used the pencil tool to draw the symbol (a stylized lightning bolt) on the square, deleted the lightning bolt space from the middle of the square, used the rectangle tool to add on a small handle, extruded it to a thickness of about 2mm, and exported the STL for printing.
Maybe two minutes to build the model, about that long to print, and we're ready to roll.
In the event, it didn't work out all that well. The rough surface of the kaju katli meant there were leaks around the edges. But it wasn't any worse than if we'd used a paper one!
Subscribe to:
Posts (Atom)


