Another little thumb drive.
The design should have some familiar elements. The disk on top, the nacelles along the sides. Pretty standard original series Starfleet stuff, right? Cute.
Now, let's plug it in (and dim the lights, since this is a new camera which I haven't figured out entirely yet).
This is my first foray into not just casemodding, but actually messing with the electronics. The core of what's going on behind the scenes is in this diagram:
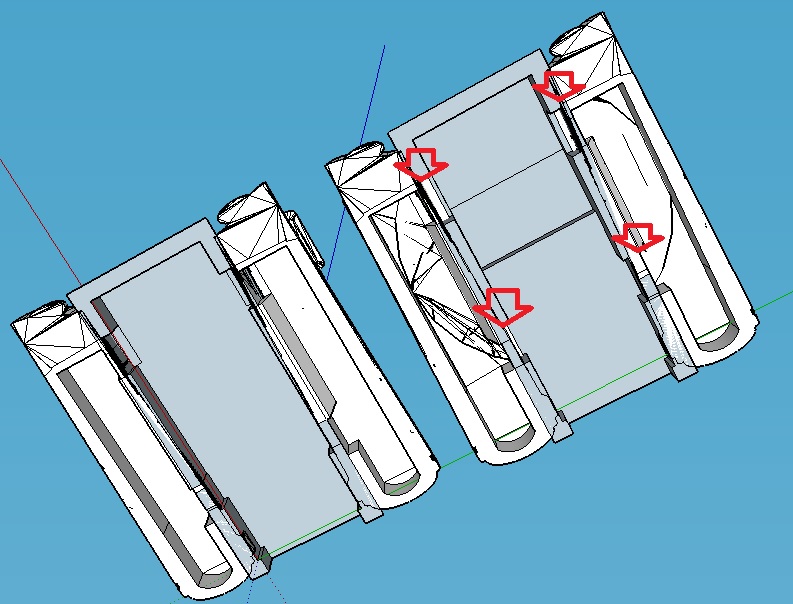
If you look closely into a USB plug, you'll see that there are four contact strips in a row. The two in the middle are where the data comes in an now. The outer ones provide power you can use for your own applications. They're the reason you can charge your phone through the same socket you might use to get upload/download data or plug into accessories. But what I wanted here was to light something up. Unlike earlier drive cases I've made, this one has actual infrastructure, looking a bit like this:

Internally, the case is hollow and divided into three compartments. The center is about the width of the drive itself but a bit longer. The nacelles are hollow as well, just wide enough to accommodate some 3mm LEDs. There are walls dividing them, but I thinned them out where the arrows are in the diagram above, leaving gaps for wires to pass through. Using wire glue (rather than soldering; I'm not a steady hand with the iron and don't want to inadvertently fry the electronics, I connected the "hot" contact to a resistor and the resistor to two wires leading the the LEDs in the nacelles. The ground-end leads from the LEDs were long enough that I could bend them to where they'd make contact in the middle (using a slip of paper to insulate the drive from the bare wires above) and then run a single wire to the ground contact. Took a bit of doing to get everything to work in the tiny space allowed, but, hey, lights.